Go to All Resources
Information on this page:
Browser Support
Collaborate Ultra requires a modern web browser with WebRTC support. We recommend
Google Chrome browser. The most recent releases of the following browsers on desktop/laptop computers and mobile devices are also supported:
| Browser | Desktop | Mobile |
|---|
| ChromeTM | Windows®, macOS, Ubuntu | TM |
| Firefox® | Windows, macOS | Not supported |
| Safari® | macOS 10.13+ | iOS® 12+, iPadOS |
| Microsoft Edge® | Windows, macOS | Android, iOS |
For more help visit
Collaborate Ultra Experience Help
Please note that Internet Explorer is NOT supported.
Back to top
To be done only once for each course
- Open your course on Blackboard (BB).
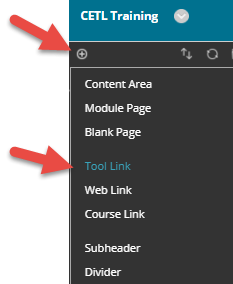
- On the top left menu of your course, click on the “+” and then click “Tool Link”.
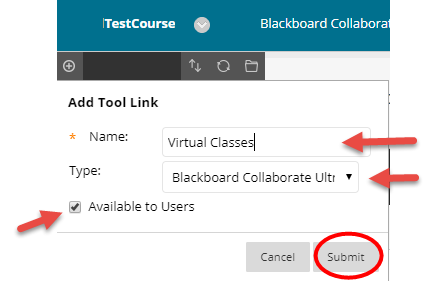
- Select “Blackboard Collaborate Ultra” from the “Type” dropdown list, give your link a name, and then click “Submit”. Students will be able to access the tool from this link if you make it available.
You as an instructor will be able to access Collaborate Ultra in two ways:

Back to top
Access the BB Collaborate Ultra tool
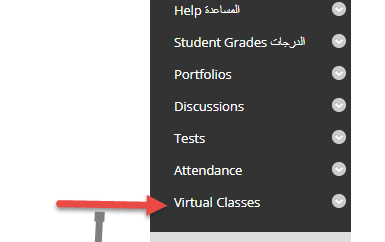
You can access the Collaborate Ultra tool from the link that you have added to the course menu or from the “
Course Tools”, and selecting BB Collaborate Ultra.

Back to top
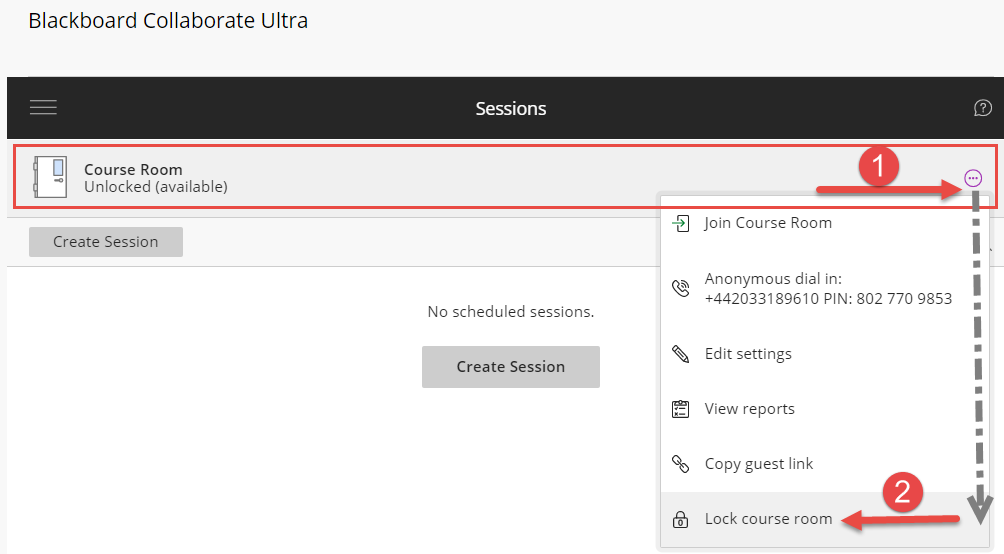
Lock the course room
It is preferable not to have a virtual class open for students all the time. We advise that you lock the “Course Room” and create sessions with specific dates and times. If you insist on using the course room, please make sure you lock it after you complete your virtual class with the students. Here is how to lock the course room from the Collaborate Ultra page.

Back to top
Schedule a Virtual Class
Access the Collaborate Ultra tool and then:
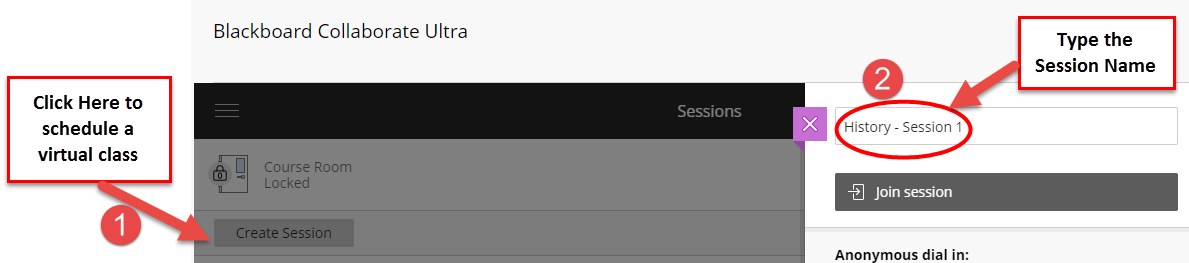
- Click “Create Session”.
- Type the session name. (Best to type your course name and number).
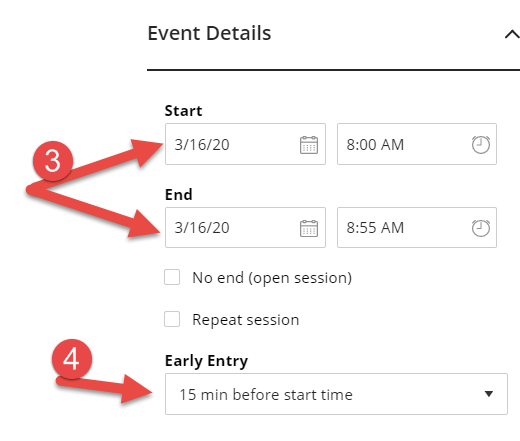
- Enter the session’s “Start” and “End” date and time.
- Select the length of the early time to enter the session for you and your students.
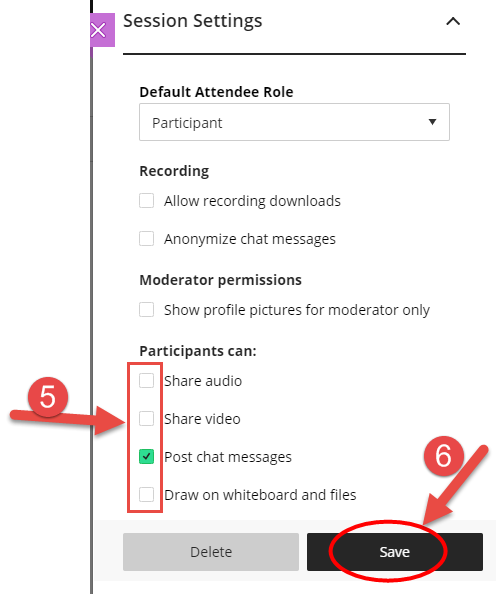
- Expand “Session Settings” to select the default settings for your participants. Uncheck the video, and whiteboard, so you can take control of the class. You may uncheck audio also. These settings can be modified while the class is running later.
- Click “Save”.
Back to top
Invite students to the Collaborate Ultra class
You can invite your students to the class by two ways:
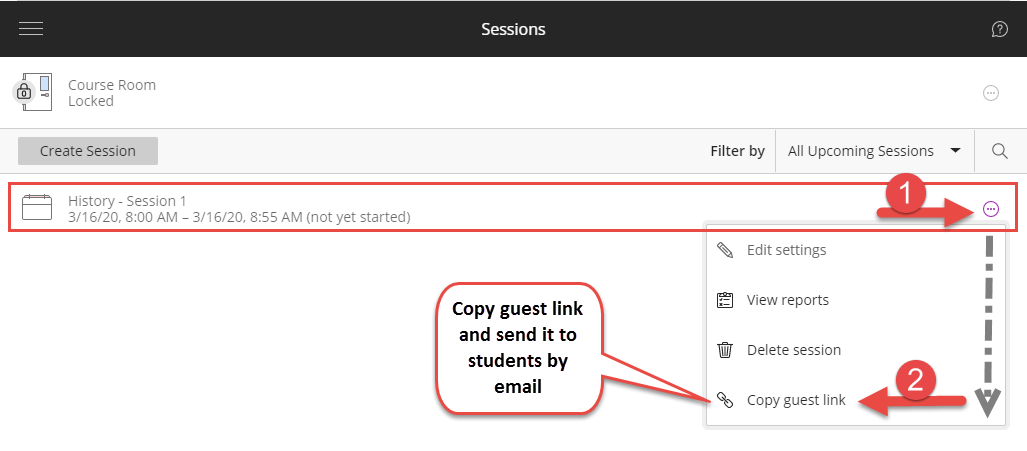
- Guest Link Copy the guest link of the virtual class and send it to your students by email. Inform them about the session time. This way is recommended if students are not able to login to Blackboard due to slowness or network problems. The link will take them directly to Collaborate.
- Through course menu in Blackboard Add a link to the tool to your BB course. Make the link available, and inform your students to use it to access the virtual classes.
Back to top
Join the Collaborate Session
From the BB Collaborate Ultra page
- Click the session name.
- Click “Join Session”.

The Collaborate Ultra class interface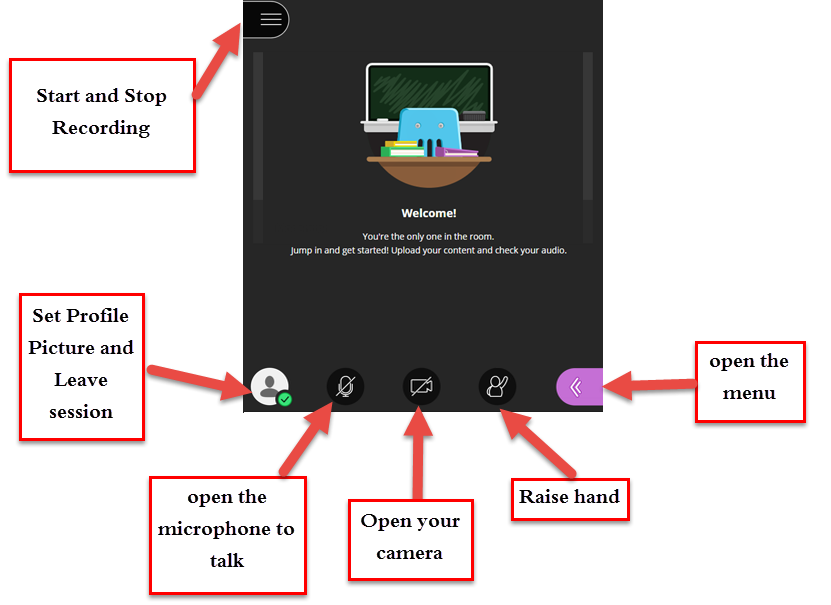
Back to top
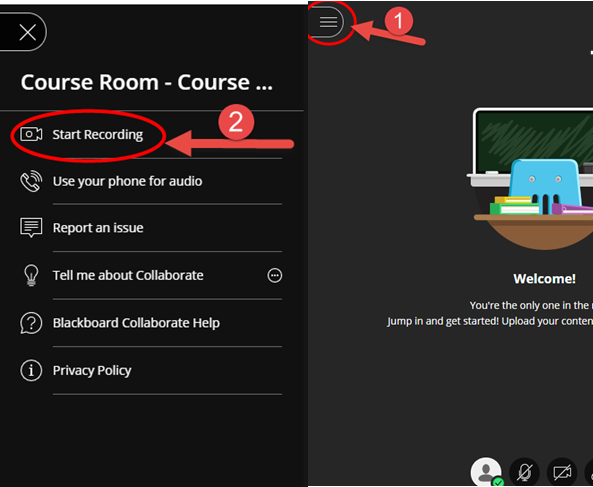
Record your Session
- While inside the virtual class, click on the top left menu

- Click “Start Recording”.
- When finished, flow the same steps to “Stop Recording”.
Back to top
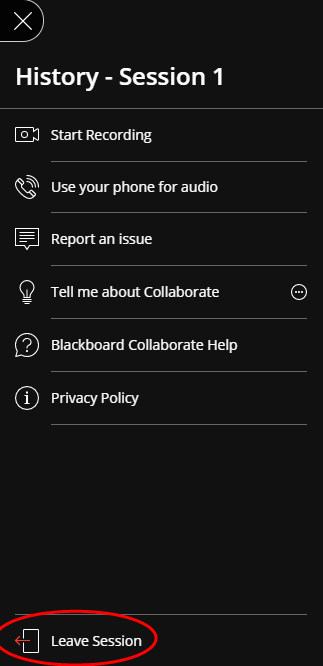
Leave the Collaborate Session
- While inside the virtual class, click on the top left menu
- Select the last option “Leave Session”
Back to top
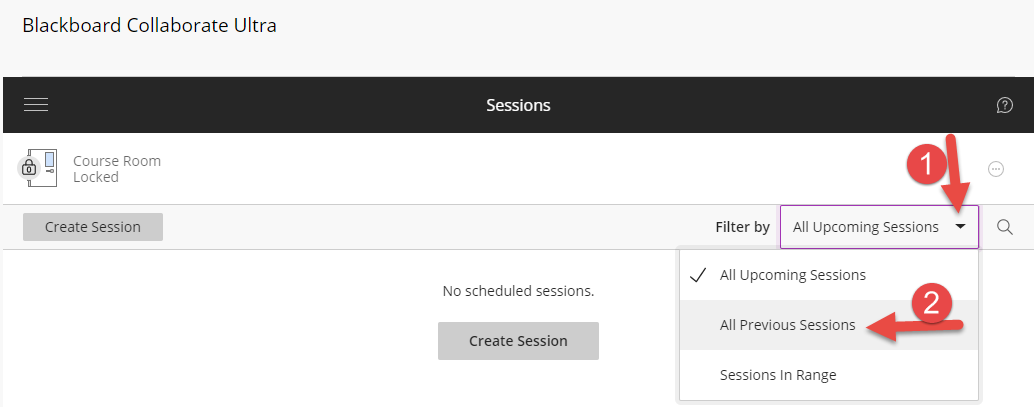
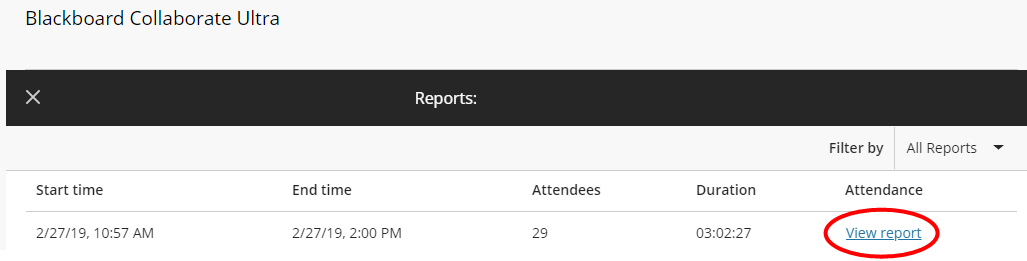
Retrieve the attendance report in Collaborate Ultra
After the session had ended, you can retrieve the attendance report from the Collaborate Ultra page by accessing “All Previous Sessions” and then clicking “View Reports” from the session options.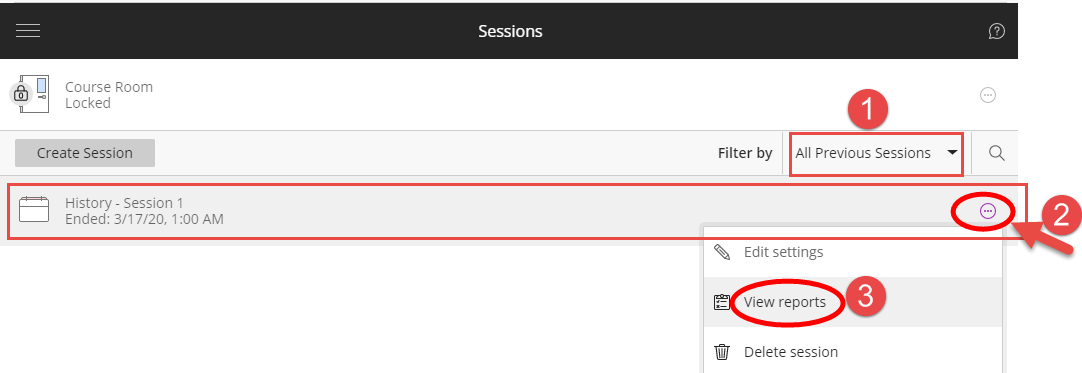
Back to top